Cleaning ticks on human feet
Please scroll down to watch the video.👇👇
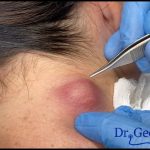
If you find a tick attached to your foot (or anywhere on the body), it’s important to remove it properly and safely to reduce the risk of infection or tick-borne diseases like Lyme disease. Here’s what to do:
✅ How to Clean and Remove a Tick on Human Feet:
1. Gather Supplies:
-
Fine-tipped tweezers
-
Antiseptic (e.g., rubbing alcohol, iodine, or soap and water)
-
Gloves (optional but helpful)
-
Small container with lid (for tick disposal or testing)
-
Magnifying glass (optional)
2. Remove the Tick Safely:
-
Do not twist, jerk, or burn the tick.
-
Use fine-tipped tweezers to grasp the tick as close to the skin’s surface as possible.
-
Pull upward with steady, even pressure.
-
Avoid squeezing or crushing the tick’s body.
-
-
If the tick’s mouthparts break off and remain in the skin, try to remove them with tweezers. If you can’t, leave them and let the skin heal.
3. Clean the Area Thoroughly:
-
Wash the bite site and your hands with soap and warm water, then apply rubbing alcohol or antiseptic.
4. Dispose of the Tick:
-
Place the tick in a sealed container or plastic bag.
-
You can store it in alcohol or freeze it if you plan to take it to a doctor for identification or testing.
5. Monitor for Symptoms:
-
Watch the bite area for signs of infection, such as redness, swelling, or a rash.
-
Keep an eye out for flu-like symptoms in the next 30 days: fever, fatigue, headache, or joint pain.
-
Contact a healthcare provider if symptoms appear or if you’re unsure how long the tick was attached.
⚠️ Do Not Use:
-
Petroleum jelly
-
Nail polish
-
Matches or heat
These methods can irritate the tick and increase the chance of it releasing harmful bacteria into the bloodstream.
Removing a tick from your foot—or any part of your body—requires careful attention to prevent infection or the transmission of tick-borne diseases like Lyme disease. The U.S. Centers for Disease Control and Prevention (CDC) provides clear, evidence-based guidelines for safe tick removal.
🧰 Step-by-Step Tick Removal Procedure
1. Prepare Your Tools
-
Fine-tipped tweezers (cleaned with rubbing alcohol)
-
Soap and water or rubbing alcohol
-
Optional: gloves and a small container to save the tick for identification
2. Remove the Tick
-
Use the tweezers to grasp the tick as close to the skin’s surface as possible.
-
Pull upward with steady, even pressure. Avoid twisting or jerking the tick, as this can cause the mouthparts to break off and remain in the skin.
-
If the mouthparts do break off and you can’t remove them easily, leave them alone and let the skin heal.
3. Clean the Area
-
After removing the tick, thoroughly clean the bite area and your hands with rubbing alcohol, an iodine scrub, or soap and water.
4. Dispose of the Tick
-
Place the tick in a sealed container or bag, wrap it tightly in tape, or flush it down the toilet. Do not crush the tick with your fingers.
5. Monitor for Symptoms
-
Watch for signs of illness such as rash, fever, or fatigue over the next few weeks. If symptoms develop, consult a healthcare provider.
❌ What Not to Do
-
Do not use petroleum jelly, nail polish, or heat to try to detach the tick. These methods are ineffective and can increase the risk of disease transmission.
🛡️ Additional Tips
-
Consider taking a photo of the tick before disposal for identification purposes.
-
If you experience symptoms like a rash or flu-like feelings after a tick bite, seek medical attention promptly.